


HELP DESK PROCESS GUIDE (AGENTS)
OVERVIEW:
The Pepperpointe technology team has a helpdesk in place to support our internal PepperPointe staff with a wide range of issues.
Our helpdesk is powered by HappyFox.
The details and steps for creating a ticket and what to do when a ticket is assigned to you are listed below.
CREATING A TICKET
-
Click + New Ticket button.
-
Add contact details:
-
Full Name
-
Email Address
-
Phone Number (optional)
-
-
Choose your category (mandatory)
-
Choose the location that the ticket pertains to.
-
Enter your subject.
-
Enter your message.
-
Be as detailed as possible. The more information we have the easier it is to help!
-
-
Pictures are always helpful!
-
They can be added by clicking the paperclip in the message field.
-
-
When finished with, click on Create Ticket to submit.
ONCE ASSIGNED A TICKET
-
Click on the subject of the ticket to open the full page view.
-
There you can update the ticket information. This includes:
-
Status
-
New - Just submitted; awaiting an assigned agent and response.
-
-
-
In Progress - Pending ticket; on course of being done or carried out.
-
On Hold - Pending ticket; temporarily paused or awaiting a solution.
-
Closed - Ticket has been completed.
-
Add’l Info Required - Agent needs additional information to move forward with the ticket.
-
Assignee
-
Priority
-
Critical - drastically affects business, needs resolved ASAP
-
High - affects business, needs resolve ASAP
-
Medium - does not affect business, but needs attention
-
Low - needs attention, but not top priority
-
-
Category
-
Due Date
-
Your due date is not the date that you expect the ticket to be completed. The due date is the date that you expect to complete your next step to help you close the ticket.
-
-
Location
-
Tags (if applicable)
-
Once you have been assigned the ticket, you will send an initial response within 1 hour.
-
This initial response may just be confirmation that they have received the ticket and are looking into the issue.
-
-
After researching the issue, you will then change the ticket status to In Progress, and respond with an action plan for how you plan to resolve the issue.
-
If you review the ticket and you require more information, change the status to Add’l Info Requited and provide a response alerting the contact of what information you need.
-
Provide updates and due date changes as you progress through resolving the issue in the ticket.
-
Once you have resolved the issue, you may change the status to Closed.
HELP DESK DASHBOARD
Your dashboard is customizable to fit whatever layout works for you.
-
You can sort between (Left side of screen):
-
Queues
-
Pending Tickets
-
All Tickets
-
Unresponded
-
Assigned to me
-
-
Statues
-
Categories
-
-
Your ticket view can also be customized.
-
Card view
-
Compact view
-
Kanban view
-
-
You can also sort your tickets by:
-
Last Replied - recent to oldest
-
Last Replied - oldest to recent
-
Last Modified - recent to oldest
-
Last Modified - oldest to recent
-
Created - recent to oldest
-
Created - oldest to recent
-
Status - New to Add’l Info Required
-
Status - Add’l Info Required
-
Priority - Low to Critical
-
Priority - Critical to Low
-
ASSIGNING TASKS TO TICKETS
- Click on the subject of the ticket to open it.
- On the right hand side of the ticket, there will be a box titled Tasks.
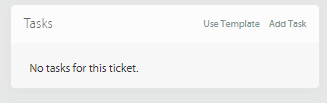
- You will click the Use Template to assign tasks to the ticket.
- The task template you will use will be titled IT Orders.
- Choose that template and select Use Template.
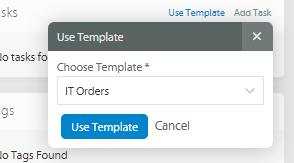
- This will add a list of tasks to the ticket.
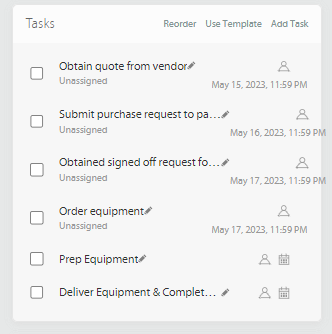
- You will click the litter person icon next to each task name to assign the task to agents.
- Once you complete a task, you will click on the check box to the left of the task name to complete it.
- Note: You will not be able to close a ticket if there are uncompleted tasks.


